Why Learn to Write in Cursive in 2026?
In an age of keyboards and touchscreens, learning to write in cursive might seem like a relic of the past. But the opposite is happening — cursive is making a comeback, and for good reason.
Research from Indiana University and other institutions has shown that the act of writing in cursive activates areas of the brain involved in thinking, language, and working memory in ways that typing simply does not. A 2023 study published in Frontiers in Psychology found that students who took notes by hand in cursive retained significantly more information than those who typed. The physical act of forming connected letters engages the brain at a deeper level.
Beyond the cognitive benefits, there are plenty of practical reasons to learn cursive:
- Your signature — Nearly every legal document, passport, and credit card transaction requires a personal signature. A confident cursive signature looks professional and is harder to forge.
- Reading historical documents — Letters from grandparents, historical manuscripts, and many official records before the 1980s were written in cursive. If you cannot read cursive, an entire layer of history becomes inaccessible.
- Personal expression — Handwritten notes, letters, and cards carry an emotional weight that texts and emails simply cannot match. A birthday card written in elegant cursive feels infinitely more personal than a typed message.
- Speed — Once mastered, cursive is significantly faster than printing because you lift your pen less frequently.
Whether you are a student, a parent teaching your child, or an adult who wants to rediscover the art of handwriting, this guide will walk you through everything you need to know to write in cursive confidently.
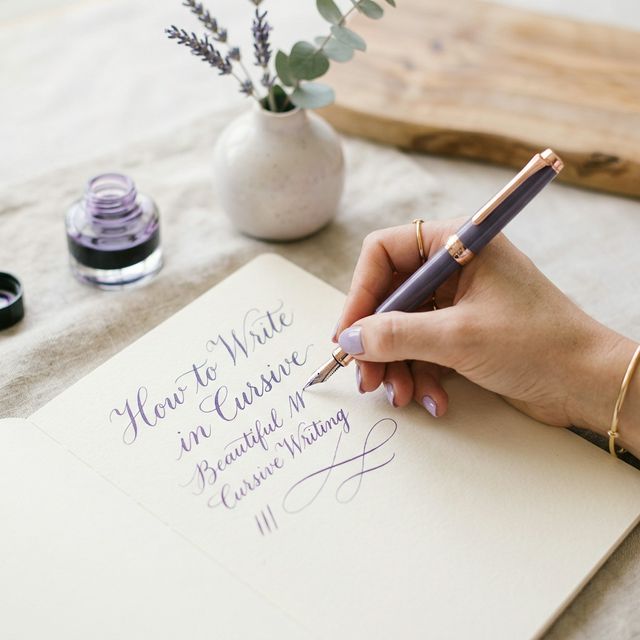
What You Need to Write in Cursive
You do not need expensive equipment to learn cursive, but having the right basics makes a real difference.
Paper
Use lined paper with a dotted midline (also called "primary ruled" or "story paper"). The dotted line between the solid lines helps you control the height of your letters — lowercase letters sit between the baseline and the dotted midline, while tall letters (like b, d, f, h, k, l) and uppercase letters extend to the top line. Wide-ruled paper (8.7 mm spacing) is ideal for beginners. As you gain confidence, transition to college-ruled (7.1 mm).
Writing Instrument
Start with whatever feels comfortable. A standard #2 pencil is perfect for beginners because you can erase mistakes. If you prefer pens, choose a gel pen or felt-tip pen that flows smoothly without requiring heavy pressure — popular choices include the Pilot G2, Uni-ball Signo, and Pentel EnerGel. Avoid ballpoint pens initially, as they require more pressure and can cause hand fatigue.
Posture and Grip
Sit on a comfortable chair with your feet flat on the floor. Your desk should be at elbow height so your forearms rest naturally on the surface. Hold your pen or pencil with a tripod grip — resting it on your middle finger and holding it in place with your thumb and index finger. Keep your grip relaxed; if your hand cramps after a few minutes, you are squeezing too hard.
Paper angle matters. For right-handed writers, tilt your paper about 35 degrees clockwise (so the top-right corner points away from you). For left-handed writers, tilt the paper the opposite direction, roughly 30–45 degrees counterclockwise. This natural slant follows the way your arm moves and produces the characteristic rightward lean of cursive writing.
The 4 Fundamental Cursive Writing Strokes
Every cursive letter is built from just four basic strokes. Master these, and you will find that learning individual letters becomes much easier.
1. Undercurve
This is the most common stroke in cursive. Start at the baseline and curve upward to the midline (or top line for tall letters) in a gentle, rightward arc — like the beginning of a smile. Letters that start with an undercurve include: a, c, d, e, g, i, l, o, q, t, u.
2. Overcurve
The opposite of the undercurve. Begin at the baseline and curve upward and over to the right, then swing back down — like drawing the top of a hill. Letters starting with an overcurve include: m, n, v, x, y, z.
3. Downcurve
Start near the midline and curve downward and to the left, then sweep back to the right along the baseline — like the left side of a circle. This stroke forms the basis of rounded letters such as: a, c, d, g, o, q.
4. Slant Stroke
A simple diagonal line that moves from the top-right to the bottom-left. This appears in almost every letter as the "backbone" that gives cursive its characteristic forward lean. The standard cursive slant is approximately 55–65 degrees from the horizontal.
Before you start forming letters, spend 5–10 minutes each day practicing these four strokes in rows across your page. Fill entire lines with undercurves, then overcurves, then downcurves, then slant strokes. This builds the muscle memory your hand needs to produce smooth, consistent letters.
How to Write in Cursive: Lowercase A–Z
Start with lowercase letters — they make up over 95% of the text you write, and mastering them first gives you the foundation to write complete words quickly. Here is a practical grouping based on similar starting strokes:
Group 1: Undercurve Starters (a, c, d, e, g, o, q)
These letters all begin with an upward curve from the baseline. The cursive a starts with an undercurve to the midline, then loops back down into a downcurve to form the body, ending with a small tail stroke. The cursive c is similar but stays open — no full loop. Once you can write a and c, the letters d, g, o, and q follow the same pattern with minor variations (d extends to the top line; g and q drop below the baseline).
Group 2: Spike Starters (i, u, w, t, r, s)
These letters begin with a sharp upward stroke. The cursive i is simply an undercurve up to the midline, a slant stroke back down, and a small curve to connect to the next letter — do not forget the dot. The cursive t is a tall version of i with a horizontal crossbar. Letters like u and w repeat the up-down pattern multiple times.
Group 3: Loop Letters (b, e, f, h, k, l)
These letters feature prominent loops. The cursive l is one of the simplest — a tall loop from baseline to top line and back. The cursive e is a small loop at the midline. The cursive f is the trickiest in this group because it loops both above the midline and below the baseline. Practice f separately until it feels natural.
Group 4: Hump Letters (m, n, v, x, y, z)
These begin with an overcurve stroke. The cursive m has three humps, while n has two. The key is keeping the humps evenly spaced and the same height. Letters like y and z extend below the baseline with a descending stroke.
Pro tip: Do not try to learn all 26 letters at once. Focus on one group per week. Practice each letter individually, then practice connecting letters within the same group. Our Cursive Alphabet reference makes it easy to see every letter side by side.
How to Write in Cursive: Uppercase A–Z
Uppercase cursive letters are generally larger and more decorative than their lowercase counterparts. Some look similar to their printed versions (C, O, S, V, W), while others are completely different (F, G, Q, Z).
Key points to remember:
- Size: Uppercase letters span the full height from the baseline to the top line — roughly twice the height of most lowercase letters.
- Connecting: Uppercase letters connect to the following lowercase letter, but two consecutive uppercase letters (like in abbreviations) are typically not connected.
- Challenging letters: F, G, Q, S, and Z have forms that differ significantly from print. Pay extra attention to these.
The uppercase cursive F looks like a tall, looping figure-eight. The uppercase cursive G starts like a printed G but adds a descending loop. The uppercase cursive Q often resembles a large number 2. These can feel strange at first, but they become natural with a few days of focused practice.
A common beginner approach: start with the uppercase letters that closely match their print versions (C, O, P, S, U, V, W) to build confidence, then tackle the more unfamiliar forms.
Connecting Cursive Writing Letters Fluently
The defining feature of cursive is that letters connect. This is what makes cursive faster than print — your pen stays on the paper longer, eliminating the need to lift and reposition for each letter.
The basic rule is simple: the ending stroke of one letter becomes the beginning stroke of the next letter. Most lowercase letters end with either a small upward curve (which feeds into the next letter's starting stroke) or a short connecting line along the baseline.
Connection Rules
- Bottom connectors: Most letters (a, c, d, e, h, i, k, l, m, n, t, u) end at or near the baseline with a curve that leads naturally into the next letter.
- Top connectors: Letters like o, v, and w end near the midline, requiring you to bring your pen down before starting the next letter.
- Tricky connections: Letters ending below the baseline (g, j, p, q, y, z) need a sweeping return stroke that comes back up to the baseline before connecting.
Start by practicing two-letter combinations: an, in, on, at, it, or, er. These are extremely common in English and will give your hand muscle memory for the most-used connections. Then graduate to three-letter words (the, and, for, but) and keep building.
Common Cursive Writing Mistakes and Fixes
Every beginner makes these mistakes. Knowing about them in advance helps you correct course early.
1. Inconsistent Slant
If your letters lean in different directions, your writing looks messy even if individual letters are well-formed. Fix: Place a sheet of paper with parallel diagonal lines underneath your writing paper as a slant guide. Aim for a consistent 55–65 degree forward lean.
2. Irregular Letter Size
Short letters bumping into the midline, tall letters not reaching the top line. Fix: Use paper with a clear dotted midline and consciously check that all short letters (a, c, e, i, m, n, o, r, s, u, v, w, x) stay between the baseline and midline.
3. Too Much Pressure
Pressing hard creates thick, uneven lines and causes hand cramps. Fix: Practice writing with a light touch. If you can see deep indentations on the back of your paper, you are pressing too hard. A smooth-flowing gel pen can help because it requires less pressure than a ballpoint.
4. Lifting the Pen Too Often
If you lift your pen between every letter, you are essentially writing print in a cursive style. Fix: Focus on the connection points between letters. Challenge yourself to write entire short words (3–4 letters) without lifting your pen.
5. Rushing
Speed comes naturally with time. Trying to write fast before you have the fundamentals down leads to illegible writing. Fix: Prioritize accuracy over speed. Write slowly and deliberately for at least the first two weeks. Speed will follow once your muscle memory is established.
Cursive Writing Practice Resources
Now that you understand the basics, the most important thing is consistent practice. Here are some resources to help:
- Cursive Worksheet Generator — Create custom practice sheets with your choice of words, sentences, or the complete alphabet. Print them out and practice with real pen and paper.
- Cursive Alphabet Reference — See every uppercase and lowercase cursive letter displayed in multiple font styles for visual reference.
- Cursive Generator — Try typing your own name and see it transformed into beautiful cursive — it is the most motivating way to start because the result is immediately personal.
Recommended practice schedule: 15–20 minutes per day, 5 days per week. In the first week, focus entirely on the basic strokes and the easiest letter groups. By week 2, start forming words. By week 3–4, practice writing complete sentences. Within a month, you will have a solid foundation for fluent cursive writing.
Remember: the goal is not perfect calligraphy. The goal is a comfortable, legible personal handwriting style that feels natural to you. Every person's cursive is unique — that is what makes it yours.